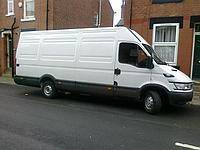
This blog details the conversion of an extra long
wheel base Iveco Daily 35S 12 to a campervan, the conversion took place between
November 2008 and February 2009 many thanks to the Self Build Motor home club
members for their invaluable contributions of help via the website.
click on link to go to site
After a lot of planning and drawing, visiting
dealers and measuring vans we decided on an extra long wheelbase high top Iveco
Daily. We found that apart from the sprinter this gave the longest usable
interior of any panel van with over 4 metres from rear of drivers seat to back
doors, but was marginally wider inside than the sprinter allowing for a 1.8
metre bed across the van. We went for the latest model we could afford which was
a 2005 35s12 . We already owned an Eldiss motorhome which as an MOT failure
would be the donor for much of the equipment in the camper.
After much searching and haggling we had our base
vehicle. First job was to strip out all the plywood lining and floors as this
was in good condition it wasput aside to be reused later for various things.
Next cut out the steel bulkhead between cab and van interior. Remove the steel
lining from abve the cab and fit a plywood floor here to form the base for
overcab storage. Then clean the floor and lay 25mm insulation over the steel
floor then relay the plywood floor, over this with a duct across the centre for
wiring and water and gas pipes.
We took a trip to Rainbow conversions to purchase
windows and a few other things. We settled on Seitz top hung windows with
integral cassette blinds and screens, these were expensive, but you get what you
pay for, and these are possibly the best motorhome windows available, and are
used by most of the major converters. Next step was to fit roof lights, and
bathroom window from donor van (Elldis 400) cut out windows and fit. There is a
lot of metal in the side walls of an Iveco daily, anti-drumming panels etc that
has to be cut away. The upside is you tend to remove more weight than you are
adding so payload unaffected at this stage. Unfortunately the camera was stolen
off the front seat while I was working, and we dont have any photos up to this
point.
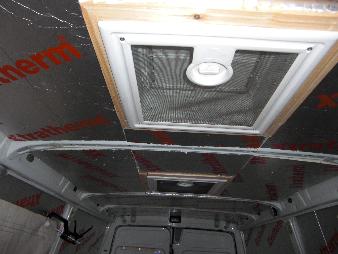
Cut holes in roof to take 2 Hekki roof lights which
were fitted for light and ventilation I had to modify the winders which raise
and lower the vents to cope with extra thickness of roof with insulation.
We have been using motorhomes for 12 years, so we
know exactly the layout that we want, a fixed double bed was an absolute must.
We had to have a freezer as well as a fridge. All the usual equipment in van hot
and cold running water, gas hob plus oven and a microwave.
because we were planning to spend a lot of time
abroad most of our cooking and dining would be outside so a kitchen tent was
purchased to house and store all the camp cooking equipment we have gathered
over the years we also have a cadaq barbecue which will barbecue, fry, grill,
roast,stir fry, and do almost anything else as well. We cook in the van when we
are travelling and only stopping 1 night at a time, and cook outside whenwe are
on site for more than a couple of nights.

Internal layout of van, bathroom at front behind
driver seat, permanent bed at the rear. Kitchen amidships nearside with dinnette
opposite. storage under bed, and seats and in wardrobe
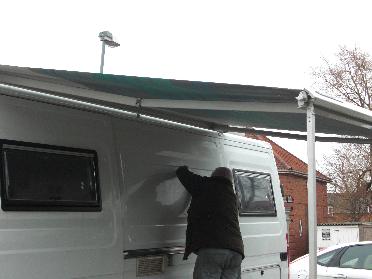
Next job fitted wind out awning Omnistore 5000
3.5 metre. I purchased high top awning brackets then heavily modified them to clear Iveco
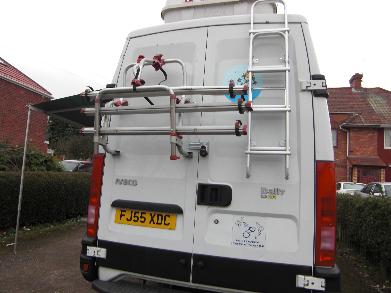
sliding door, then fitted Fiamma drip stop over sliding door. Fitted roof box
the main purpose for this is to carry satellite dish and tripod for English TV
in France and Spain, rear ladders for access to box is from CAK tanks of Warwick
highly recommended company. Fiamma cycle rack for cycles of course, but also
handy for carrying a variety of things.
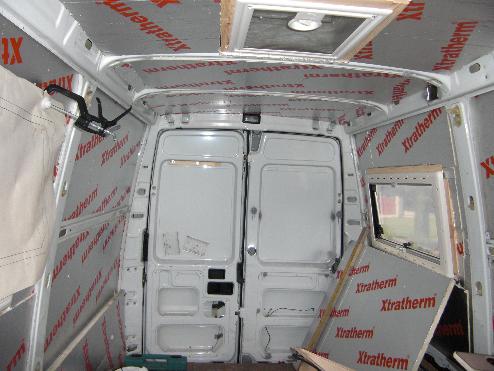
It is really important to insulate the van to
keep it cool in summer, warm in winter and most important eliminate condensation
We fitted xtratherm 25mm insulation to walls roof and floor,
supplemented with expanding foam and rockwool to fill gaps voids and cavities.
Difference in internal temperatures felt straight away, there is no insulation
to rear doors as fitting plywood bulkhead at rear of bed with insulation
attached, rear doors will only give access to under bed storage not interior of
van plus a small amount of storage within the doors.


 cassette toilet
and access door
cassette toilet
and access door
Fit cassette toilet and external door for
cassette toilet. toilet compartment to be built around this. Next run first fix
wiring and plumbing and gas pipes through channels in ceiling and duct under
floor. Fit 75 litre water tank under bed space with shurflow electric pump, and
gas fired water heater under seating area to deliver hot and cold running water
to kitchen and bathroom,

install vents and gas flue  for three way fridge
Cut out access panel and fit locker door for
access to under bed storage from exterior of van, frame from CAK tanks of
Warwick,door panel is from metal cut out to form opening in
van.
start fitting overhead lockers and
wardrobe


overhead cupboards above dinnette
Wardrobe
fitted with oil filled radiator in base I find that a small oil filled radiator
will keep a well insulated van quite warm, and can safely be left on all night
in complete silence. We also use a wall mounted fan heater to give a quick blast
of heat and an almost instant change of temperature in the van. We only wild
camp in the warmer months and so far have found no need for gas heating.
This blog details the conversion of an extra long wheel base Iveco Daily 35S 12 to a campervan, the conversion took place between November 2008 and February 2009 many thanks to the Self Build Motor home club members for their invaluable contributions of help via the website.
Internal layout of van, bathroom at front behind driver seat, permanent bed at the rear. Kitchen amidships nearside with dinnette opposite. storage under bed, and seats and in wardrobe
It is really important to insulate the van to
keep it cool in summer, warm in winter and most important eliminate condensation
We fitted xtratherm 25mm insulation to walls roof and floor,
supplemented with expanding foam and rockwool to fill gaps voids and cavities.
Difference in internal temperatures felt straight away, there is no insulation
to rear doors as fitting plywood bulkhead at rear of bed with insulation
attached, rear doors will only give access to under bed storage not interior of
van plus a small amount of storage within the doors.


 for three way fridge


fit shower tray and wash hand basin and then plumb
in, then form shower room around fittings, bathroom cabinet and storage will be
in overcab area above wash hand basin. and over the driving seat shower head is
on basin taps which pull out on an hose and attach to fitting on wall


Electrics sorted and wired in, split charge layout
courtesy of Telshador at the SBMCC ( self build motor caravanners club ) 2 X 110
amp leisure batteries charging from alternator through 100 amp relay wired
through smartcom relay. This also powers 3 way fridge when on the move. 3000
watt maximum 1600 watt inverter for freezer and microwave when not connected to
mains. All boxed in and ready to go Mains electrics and 12 volt distribution
all wired up


fitting worktops and plumbing for sink built in
micro wave oven fitted above freezer
gas hob and sink top fitted and working
there is a under cupboard strip light above. The small freezer fits under the
microwave it is mains powered and runs off the inverter whilst travelling the
leisure batteries will power it for a couple of days if no hook up available. We
both read a lot and like plenty of light so the interior of the van has 2 x 12
volt dome lights 4 x 12 volt strip lights and 4 x 240 volt strip lights plus LED
reading light above bed, and 2 x 240 volt exterior awning lights.


 roof lining done with corded carpet from allied
carpets £1.99 per sq metre
roof lining done with corded carpet from allied
carpets £1.99 per sq metre
glued with high temperature resistant contact
adhesive
 custom made orthopaedic mattress
1800 x1200
ready to go on bed base
this was quite a beast and would not bend or give
at all and I spent a considerable amount of time wrestling it into the van, I
still have to fight it every time I change the fitted sheets, but it is well
worth it for the most comfortable mattress we have ever slept on.

table and seating ready
for use
 fixed double bed across rear of van. Plywood
rear bulkhead wall with access under bed from outside and inside. bathroom walls
decorated and ceiling lined
fixed double bed across rear of van. Plywood
rear bulkhead wall with access under bed from outside and inside. bathroom walls
decorated and ceiling lined


Cab seats fitted complete with swivels, screen on
dash is for reversing and rear view monitor for cameras
2 cameras mounted at
rear one high level and one low level. Monitor is switchable between cameras and
is invaluable when reversing or towing

seat swivelled for use on site

dinette upholstered there is a choice of 2 tables
this is the smaller one


bedroom complete with custom made mattress, walls
have now been wall papered
kitchen complete and ready for
use


upholstery and bedding installed

under
bed storage access from inside

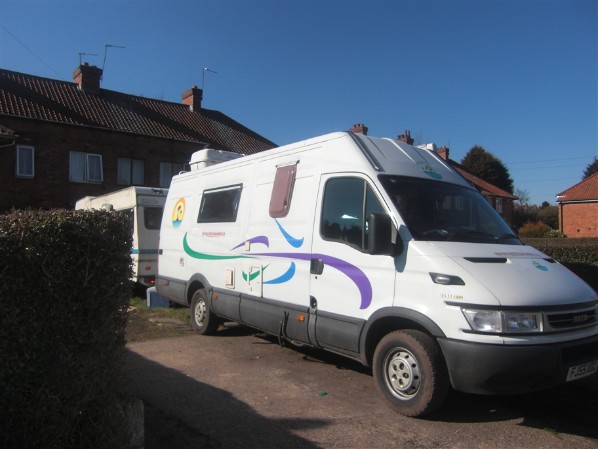
no problems with completed van it drives a treat
Fiamma privacy room fitted to Omnistore awning
with only
slight modification
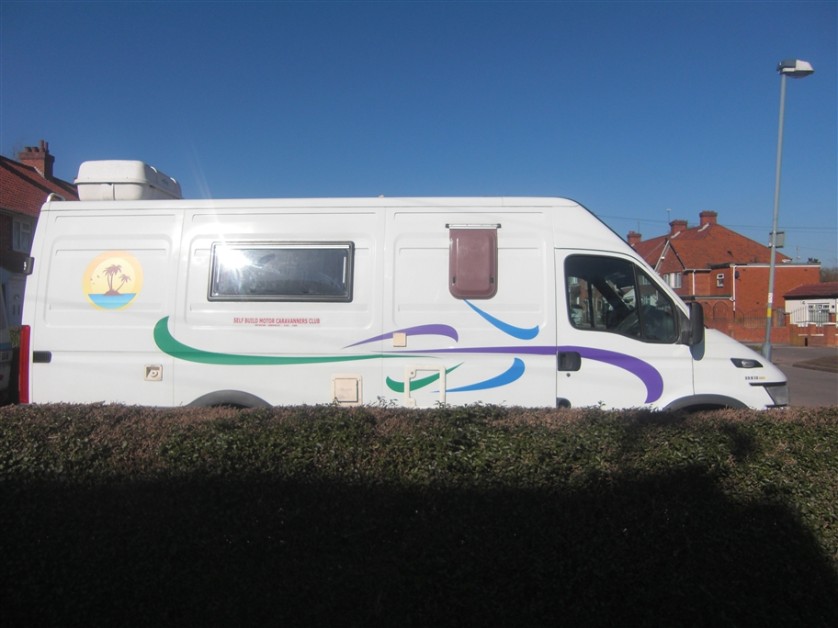
 March 2010 vinyl graphics added to van
sides
March 2010 vinyl graphics added to van
sides


gas hob and sink top fitted and working there is a under cupboard strip light above. The small freezer fits under the microwave it is mains powered and runs off the inverter whilst travelling the leisure batteries will power it for a couple of days if no hook up available. We both read a lot and like plenty of light so the interior of the van has 2 x 12 volt dome lights 4 x 12 volt strip lights and 4 x 240 volt strip lights plus LED reading light above bed, and 2 x 240 volt exterior awning lights.


glued with high temperature resistant contact adhesive

1800 x1200 ready to go on bed base
 fixed double bed across rear of van. Plywood
rear bulkhead wall with access under bed from outside and inside. bathroom walls
decorated and ceiling lined
fixed double bed across rear of van. Plywood
rear bulkhead wall with access under bed from outside and inside. bathroom walls
decorated and ceiling lined 


2 cameras mounted at rear one high level and one low level. Monitor is switchable between cameras and is invaluable when reversing or towing


My cousin recommended this blog and she was totally right keep up the fantastic work!
ReplyDeleteCampervans For Sales
Thanks mate!!
ReplyDeleteWas losing hope and found your site, Spot On!!
Just got my XLWB Iveco and looking for parts, may need some info on the electrics.
Great Blog/Site?Article....Whatever...Great!!
Hi there, great blog thanks for sharing! Myself and my fiance have just started converting an identical model. I'm trying to work out where to put the gas as the panels aren't friendly to cutting a locker door big enough, as I'd end up chopping through support struts. Where did you put yours? Cheers, Macky
ReplyDeletereally enjoyed reading your build.i've just bought a '99 xlwb daily which i'm hoping to build soon.can i ask as i've never camped or caravaned how does the toilet work and how easy/hard are they to instal?i'm hoping to have one over hanging by the sliding door for easy access and no cutting of the door.
ReplyDeleteHi, amazing conversion!
ReplyDeleteBtw Does your bike rack take 3 bikes? Which one is it?
Thanks,
Nathan